Sunday, January 25, 2015

Vangibhath - One pot rice dish, a quintessential kannadiga staple

Another week passes by with much happening and here I am on a Sunday evening with a delicious, traditional recipe from home. Many of you have asked me for this recipe in the last year or so, I had to put it off until now to make sure I got consistently great results with my powder before I shared the recipe with you all. There are some recipes that though you have the exact measurements, something seems to be lacking when you make them. If you ask nammamma, she would say, "kai palagabeku" which translates roughly to "you need to become more experienced with practice". I believe I have reached that stage with Vangibhaath powder now.

Vangibhaath is a traditional rice preparation in Karnataka, attend any wedding or other auspicious ceremonies, you will get to enjoy the taste of this divinely delicious item. Though vaangi is not a kannada term, it is more closely related to vankaya (brinjal in Telugu) or vangi (Brinjal in Marathi), the name vangibhaath has stuck in Karnataka homes. This is prepared very differently from the bhaath in Maharashtra which uses goda masala.

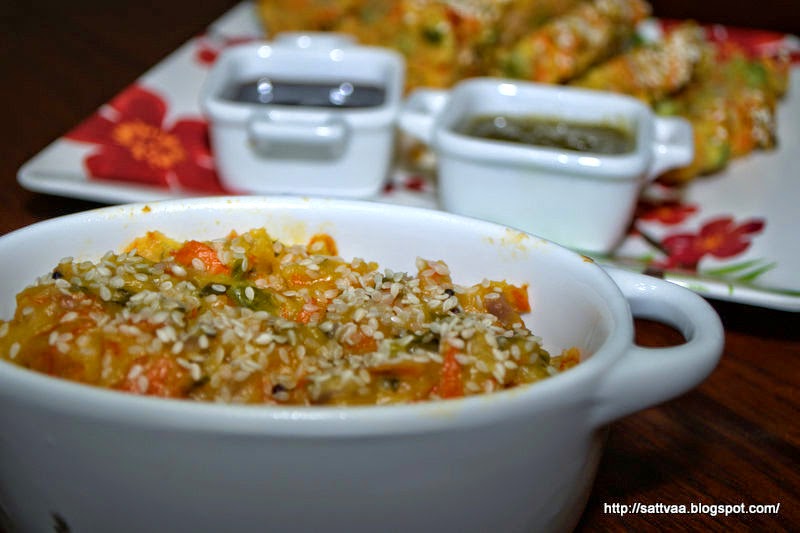
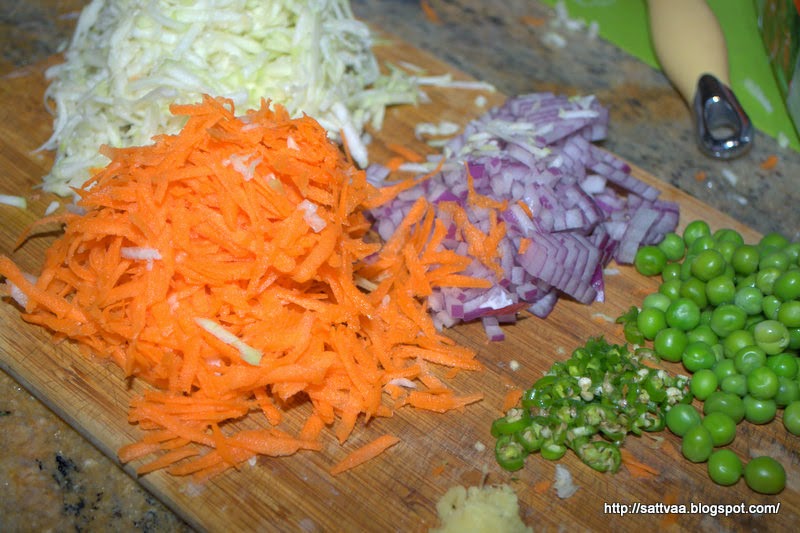
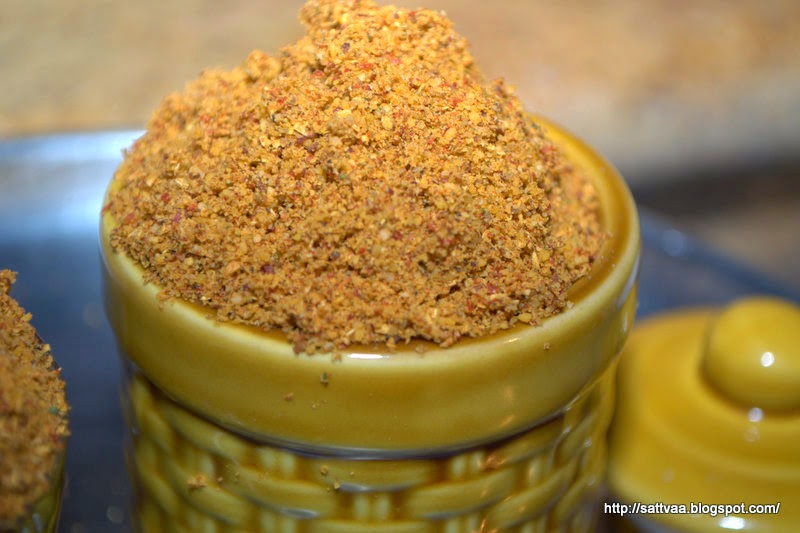
Vangibhaath is typically flavored with spices such as cinnamon, cloves, nutmeg, mace and coriander seeds. The heat comes from both black and red pepper. Spices are toned down from the sweetness of coconut and the unmistakable asafoetida is added for flavor. Once the powder is ready, you can go creative with the usage. Brinjals do not have to be the 'be all, end all' vegetables for this recipe, you can use green peppers, colored peppers, combination of vegetables such as green beans, carrots, green peas etc. Whatever choice of vegetables makes you happy (within a certain boundary ofcourse, don't use radishes in vangibhaath :-)). You can make a super yummy masala upma by throwing a spoon full of this powder while making uppittu or upma. You can even use this powder to make quinoa bhaath like I did here.
This has to be the very first recipe I cooked as a new bride when I got married. With a brinjal crazy FIL, anything with eggplants is heartily welcomed at the dining table in our home. Those were the days, I was not a very confident cook in the kitchen especially in a new kitchen. But the bhaath turned out delicious (secret being the powder nammamma had sent with me) and I was crowned the defacto vangibhaath queen. Like everything else, nammamma always made this powder in large quantities and used to store, I prefer to make small batches and finish it off quickly.

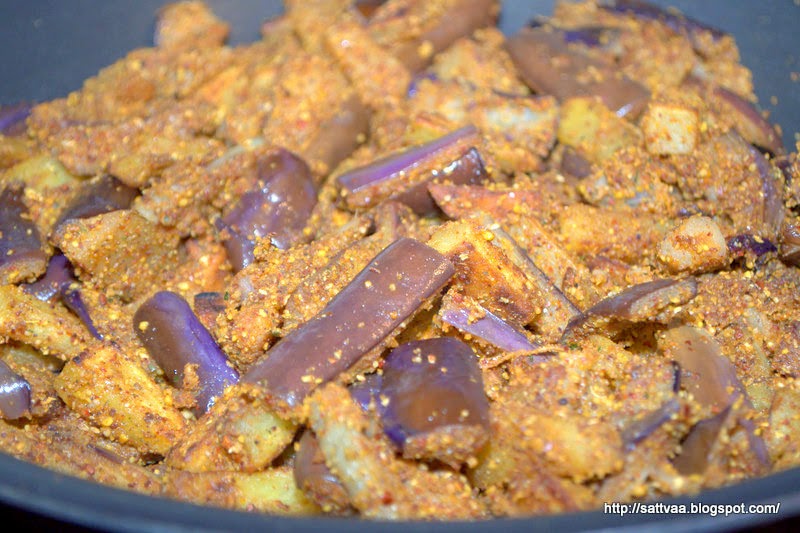
In Mysore home, the preferred brinjal for the bhaath was always the light green, long ones called eeranagere (village where the vegetable came from) badanekaayi(brinjal in kannada). I do not remember amma using any other brinjals for this recipe. These brinjals were slender, devoid of seeds and held their shape without going all mushy on you upon cooking. I have not seen the green brinjals in ages now and make do with the Japanese purple eggplants. Do not use the big eggplants as they tend to be more fleshy and collapse into a watery mess after cooking. You need to take a few precautions while cooking eggplants from an aesthetic and taste perspective. I have noted a few lines below on what works for me, feel free to follow suit. If you get the green eggplants, good for you, make the bhaath and don't forget to send me some for taste :-)
On a recent trip to Chennai when we were in India, cousin L made Vangibhaath for all of us and it tasted delicious as always, she said her powder recipe has an ingredient called dagad phool or stone flower. I had never heard of it until then, not something used in South Indian spice powder preparation. L even swore that dagad phool was what made the difference to Vangibhaath and offered to pack me some of it to carry. It looks like dried, crumpled paper that you lift midway from getting burnt at the fire, doesn't have any smell in its raw form but I was told that it adds a woody, smokey aroma to the powder when roasted and mixed. I am a little bit of a stickler to traditional recipes in certain areas especially when trying to reproduce the smells and tastes from nammamma's kitchen. She made one of the best vangibhaath in the entire world :-) and I like to stick to her tried, tested and enjoyed recipe.
If you happen to find dagad phool in a store near to you, go ahead and use it but I will promise that the powder recipe below (without dagad phool) makes a delicious vangibhaath. This is how my mom made it always and I believe I have her recipe nailed down correctly.

Before we go into the recipe details, here are a few things I want to discuss with you, please pay attention especially if you are a first timer to this recipe, just making some grand declarations, nothing serious :-).
  • There is no onion, tomato or garlic in Vangibhaath, it is a saatvik preparation and do not add these ingredients unless you are ok turning it into a fried rice of some sort. 
  • Amount of tamarind depends on your tolerance for tartness, so use judiciously. Nammamma used to soak dry tamarind, extract the juice, let it boil for a few minutes with the vegetables until the water evaporated, I however take a short cut with the ready made tamarind concentrate. Saves me some time, adds instant sourness, no liquid to evaporate or raw smell to boil. Choose whatever works for you. 
  • Kannadiga Vangibhaath traditionally uses a long grained rice like sona masoori. Any long grained non sticky rice should be good. I am personally not in favor of using Basmati variety for this as the innate flavor of rice conflicts with the spices. 
  • Eggplants in Vangibhaath should be cooked fully but hold up shape. 
  • I add potatoes just to make it DD friendly as she is psychologically averse and allergic to eggplants :-)
  • Vangibhaath is a slightly spicy rice dish with cloves, pepper adding to the heat, so nammamma always adds a small bit of jaggery while preparing it. I like the taste and continue the tradition. 
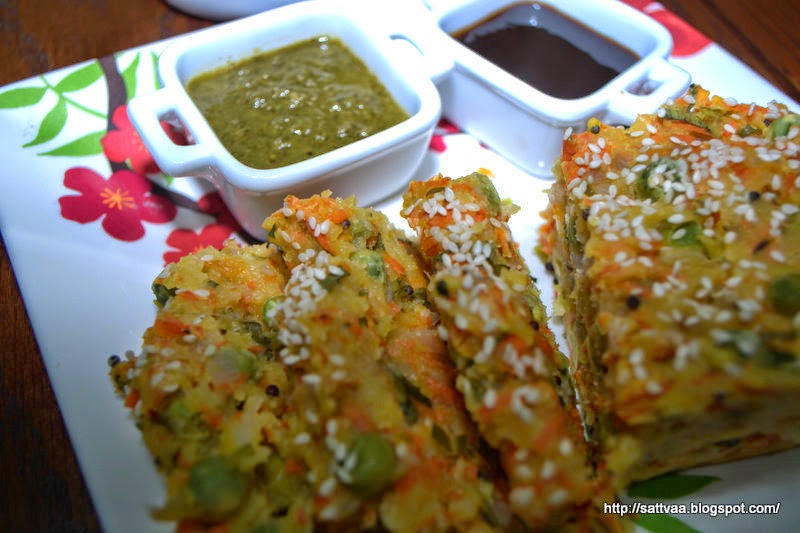
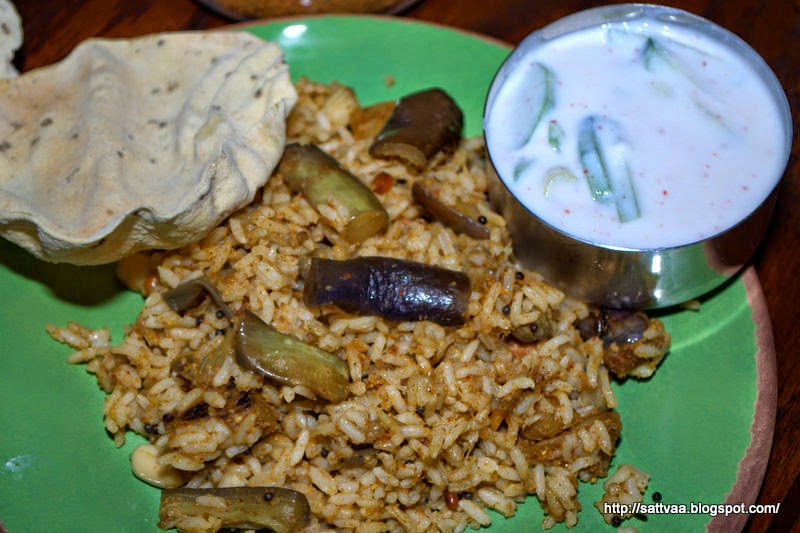
So here is the recipe for Vangibhaath from Nammamma's kitchen, hope it brings back memories of your own and also stands up to the expectations. Would love to hear from you all. By the way, the best side dish for vangibhaath is a cool yogurt raita. 

And for all my Indian friends, HAPPY REPUBLIC DAY!
What do you need to make Vangibhaath powder?
1/4 cup chana dal
1/8 cup urad dal
1/2 cup coriander seeds
1 Tsp cumin seeds
1/2 Tsp fenugreek seeds
1.5 inch piece cinnamon
4 cloves
6-8 black pepper corn
small piece of nutmeg
2-3 pieces of mace/jaapatre
4-6 curry leaves
1 Tbsp dry coconut grated
1/8 Tsp hing
8-10 dry red chilies (mix hot & mild varieties)
1/8 Tsp Turmeric powder
1 Tsp oil
How do you make Vangibhaath powder?
  • Add oil to a heavy pan and heat it on medium high. Add the dals and roast for a minute. 
  • Add the rest of the ingredients except for dry coconut and asafoetida and roast them stirring frequently until the dals turn bright pink in color and the spices give out a beautiful aroma. 
  • Add dry coconut, asafoetida, mix it once, switch off and let cool. 
  • When completely cooled, grind in a dry mixer jar or spice grinder to a powder, a rava like texture is perfectly acceptable.  
  • Keep in a closed container until ready to use. If you make in large quantities, freeze the powder, stays fresh for months. 
What do you need to make Vangibhaath? 
Brinjals - cut into 1/4 inch thick X1 inch long pieces - about 2 cups
Potatoes - cut into 1/4 inch thick X1 inch long pieces - about 1 cup
3 Tbsp of Vangibhaath powder
1/2 Tsp crushed jaggery
1/2 Tsp Tamarind concentrate 
1 Tbsp salt (adjust to taste)
3 cups cooked rice - sona masoori or long grained rice
4 Tbsp oil - divided use
1/4 Tsp ghee

Seasoning
1 Tsp mustard
1 Tsp chana dal (optional)
1/2 Tsp urad dal (optional)
2 Tbsp peanuts
few curry leaves
pinch of hing
pinch of turmeric powder

How do you make Vangibhaath? 
  • Wash and cook rice so grains are fully cooked but stay separate
  • Put into a wide bowl and let it cool down. 
  • Parboil potatoes until just tender, drain all the water. 
  • Heat 1 Tbsp oil in a wide skillet, add drained potatoes in a single layer, sprinkle a pinch of salt on top and roast them until they develop golden brown covering. 
  • Keep aside.
  • Heat another Tbsp oil, add brinjal pieces, cover and cook on medium heat for 2 minutes, remove cover, mix and cook for another minute covered. 
  • The steam from the covering will help brinjals cook faster and evenly. Once they are soft but still hold shape, add salt. 
  • Mix in potatoes, add tamarind concentrate, crushed jaggery and give a gentle mix. 
  • Add the powder, mix well, cover and cook for 2 minutes on low heat so the vegetable soak in the spices. 
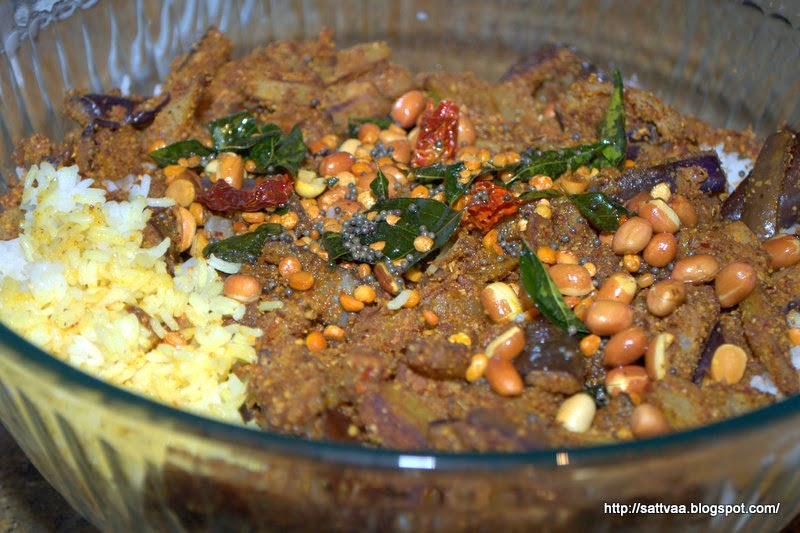
  • Take it out and spread it on top of the cooked rice. 
  • Prepare seasoning, pour it on the rice+vegetables. Let it all cool down. 
  • With gentle fingers, mix them together so the rice grains absorb the spices, and juices.
  • Add a 1/4 Tsp ghee, mix and set aside for atleast 30 mins before serving. 
Notes: 
  • If you are making a big batch of powder, skip the dry coconut as it spoils faster than other ingredients. You can add a handful of grated dry coconut to the seasoning for a slightly different but delicious variation. 
  • Add cashews instead of peanuts if you prefer. 
  • Secret of good vangibhaath is in roasting the ingredients for the powder. If you watch the chefs in weddings, they roast the spices in a lot of oil as they want to enhance the taste and also get it done quickly. To achieve the same results without the oil, you need to be patient while roasting the spices. Giving the dals a little head start ahead of other ingredients helps get them all crunchy and cooked. 

Sunday, January 18, 2015

Semolina (Rava) savory cake - a game changer cake

Go HAWKS :-), after a nail biting game earlier today which I stayed away from watching (because the scores of 0-13, 0-16, 7-16, 7-19 is not really conducive to weak hearted HAWKS' fans :-)), but then it followed me wherever I went. First, it was the loud screams from downstairs that kept informing me the game was not going well for Seattle, then the little pre-teens in my class that kept looking at their Iphones and other phones for a glimpse of the latest score. As I phonily tried to discipline them and threatened to confiscate all electronic gadgets in the room, they entertained me with whispered exchange about the state of the game. And when it ended, I knew we had won just by looking at the gleeful faces :-). So not one to pass up on a chance to teach life lessons, I told my kids, "never give up, no matter how bad things may look".
If you follow football, this was a very shaky game played between two of the strongest teams and finally 4th quarter turned the tides over to favor the Hawks as the score climbed 14-19, 22-19 but ended with a tie at 22 when the clock ran out. Hey, wait, the clock didn't run out actually as the game went into overtime and hawks turned it over with a touch down in overtime to finish with 28-22 :-). Every time I watch a foot ball game, I think how untrue everything I have ever learnt about time is. You have heard the saying, "you can't hold the time in your fist", but that is what literally happens during a ball game. They stop the clock every couple of minutes and if you are sitting in your living room sofa, you will be flooded with advertisements. So a game of  '60 play time minutes' converts into '2.5-3 real time hours' :-). Who said that 'time & tide wait for none'?

What has football got to do with a food blog? I know, it seems far fetched but hear me out. Just like the game changers in today's game, today's recipe is also a game changer in its own way. If you always related a cake to a sweet in your head (I did, until I came across this recipe), here is something that will surprise you pleasantly. This is a savory cake, and made with semolina (or Rave/sooji as we Indians like to call it) and loaded with vegetables and spices that makes it a perfect breakfast or snack recipe. You can munch on it without the guilt factor and also feel extremely gratified that you had your daily quota of vegetables while enjoying a slice of this cake. This is a moist & light cake, that is to something for a cake made with nothing but 2 Tbsp of oil making up the only fat content. Win-win :-).
I had seen this recipe on many blogs and had head marked (not bookmarked unfortunately so I can call out the blogs by name), that is another thing, sometimes when a recipe catches my attention, I head mark it thinking I will definitely remember it. Loss is mine when I don't but sometimes they get rooted so much in the head that I will get it out ultimately, no promises though on how close it is to the original recipe. Here is what happened recently, I had honestly forgotten about this recipe but then when I was browsing the internet, I came across this little video on BBC food that had Anjum Anand making a savory semolina cake. That name struck a chord and I went into the kitchen immediately to whip up my own slightly modified version of the recipe. The original recipe adds uncooked/raw vegetables directly into the batter, but I slightly sauteed them before adding them in. Also, I like my green beans chopped finely instead if the inch long as in the original. Last, I added my love of life in kitchen - onions, chopped and sauteed along with some green, spicy chilies.
Something in the way she bakes it in a loaf pan was intriguing and instead of what I would have done, I used a loaf pan too. It is just easier to cut into slices. But you can very well use a cake pan or even a bundt pan to bake this deliciously savory cake. Rich in vegetables and topped with sesame, this reminds you of the Gujarati Handvo but the taste is very different and a surprise winner. Second time, I made a healthier version with cracked wheat but the verdict was to stick to the semolina version since the other one was crumbly and didn't really stay true to being a 'slice' :-). I have a plan for the next time though, I will get the finest textured cracked wheat and may be grind it up a little bit to make it finer, nobody will be any wiser. I will come back and update the blog post when I get to it.
What do you need to make Semolina cake?
1 cup fine sooji/rava/semolina
1 cup whisked plain yogurt
1 Tsp salt (adjust to taste)
1/2 Tsp sugar
1/8 Tsp asafoetida
1 Tsp sesame seeds
2-3 green chilies - finely chopped
1 inch piece ginger - peeled and grated
2 Tbsp green frozen peas
1/2 cup grated carrot
1/2 cup finely chopped onion
1/2 cup grated bottle gourd (optional)
1/2 cup grated bell pepper (of any color, optional)
2 Tbsp chopped cilantro
2 Tbsp oil
1 Tsp baking soda
How do you make Semolina cake?
  • Take semolina in a large bowl, add salt, sugar and grated ginger and mix well. 
  • Add yogurt and mix well. Keep aside for atleast 20 minutes for it to soak the yogurt and become fluffy. 
  • In the meantime, preheat your oven to 350F
  • Heat a pan on medium heat, add mustard and let it pop. 
  • Add chopped green chilies and asafoetida and fry for about 20 seconds, do not burn the chilies. 
  • Add chopped onion and let it sweat and become limp. 
  • Add grated carrots, bottle gourd and green peas and cook for couple of minutes until the vegetables turn soft. 
  • Switch off and add it to the semolina bowl along with chopped cilantro and give a good mix. Taste and adjust as needed.
  • Prepare a loaf pan (I used mini pans and hence spread the batter into 2 of them) with a baking spray. 
  • Add baking soda and give a good mix to avoid baking soda forming lumps (believe me when I say you don't want baking soda bursts in your mouth :-))
  • Spoon out the batter into the baking dish, top it with sesame seeds (be generous if you like sesame) and bake for 30-35 minutes until the top gets a hint of brown and a knife comes out clean. 
  • Let it cool outside the oven for 15 minutes before sliding the loaf onto a plate, use a sharp knife to cut slices and enjoy with any chutney, dip etc 
Notes: 
  • You can add finely chopped green beans to your set of vegetables. 
  • Chopped fenugreek will make a great flavor agent too. 
  • The batter consistency is that of thick idli batter, adjust yogurt or add a spoon or two of water. 
  • Add upto 2 cups of vegetables to 1 cup of semolina. 
  • If your frozen peas are hard and big (I get Deep brand sometimes which needs a little precooking), microwave in a bowl of water for 5 minutes to make it softer. American brand peas are ready to use directly. 
  • Baking soda can be replaced by Eno fruit salt. 
  • Add red chili powder for extra spice. 
Making the semolina cake healthier: 
  • Use fine textured cracked wheat instead of semolina if you are avoiding processed foods. 
  • This will need a little bit more yogurt as it absorbs liquid, adjust to get the right consistency. 
  • It is important to let the cracked wheat soak in yogurt for atleast an hour before you use it. 
  • This will have a more crumbly texture compared to the semolina version, let it cool down completely before slicing. 

Sunday, January 11, 2015

Panzanella - bowlful of fresh, crispy salad: you don't need a resolution in the new year to enjoy this deliciousness

Have I told you grocery shopping gives me pleasure and lifts my spirits? :-), I just don't have the same patience and tolerance for shoes or clothes. I can walk around the aisles filled with fresh produce with images of many delicious dishes swimming in my head and plan an entire week worth of recipes during my weekly grocery pick up. Strange? Aren't we all at some level?

I am a list person and like to call myself well organized. I graduated from hand written notes to oneNote on my laptop synced with the one on my phone (technology advances such as these are really handy) and so whenever I see something need to be replenished or I want an ingredient, it goes on my note and the next time I am in the store, I just have to go by the list. Well, the list was also for another purpose - to avoid reduce impulse buying and eliminate wastage. It works great but I won't call myself 100% successful at staying away from those unplanned purchases :-), it happens once in a while.
During the holiday season, on one of my shopping trips, I found this really big bag of stuffing (croutons+a packet of seasoning included). I used to keep a small container of bread crumbs in my pantry but now I mostly use left over bread at home since I bake often. Croutons is another story, I have never bought except for eating them in salads. It was the season of joy and everyone was purchasing big and seeing those bags of stuffing in every shopping cart around me, made me splurge and bring home one myself. I had big plans of making a casserole, spreading the croutons on top and serving it to dear family. The bag stayed firmly on the counter top, staring directly at me day after day when I came home in the evening and I didn't get around to it even after a couple of weeks of purchase. I changed my mind story and told whoever was listening that I would crumble them in the blender and use it in cutlets:-). I could have served cutlets to an army with that much of crumbled bread. Another week passed and that didn't happen either. Years of familiarity has my family prepared to such things and they very fondly overlook these strange behaviors of mine. BH did make an unkind comment that may be a payasa/porridge would be the next idea. Before we went on our vacation 2 weeks back, I surreptitiously pushed the bag into the pantry with an excuse of cleaning the kitchen, closed the door and left home happily. I confess, I was out of all my wild ideas of using that bag of croutons and was planning to chuck it when I returned home.
Like they say, "Every grain bears its eater's name", these croutons had our names carved on them and the stars just aligned to show me the light :-). Coming back, we had a lay over and as I was walking around the airport to stretch my stiff limbs, I happened to walk into a book/magazine store. There it was on the stands, 'Bread baker's basics' and I was flipping the pages as I always do when I see colorful food pictures, I saw this gorgeous looking salad in a bowl. This was not one of those salads with a few sparsely thrown croutons, instead this one called for equal proportions of croutons and vegetables. Perfect way to use up my bag sitting in the dark pantry. One look and I almost yelled for BH, who was innocently looking at some books on the other side of the store. I showed him the picture and promised I would make that salad as soon as we reached home. I didn't make good of the promise - atleast not the 'make as soon as' part since our flights got delayed and we ended up eating dinner on the way. But I did make it the very next day and the next day and a couple days after. It was sooo... delicious.
I don't have a resolution for the new year but this light yet flavorful salad sounds like a great dinner option if you are looking to eat healthy. Easy to put together with bursts of basil freshness, full of fresh vegetables and the tangy vinegar make this one no less enticing than our Bhel puri, I see those eyes twinkle and ears perk up for all of you snack lovers. Crunchy toasted croutons steal the show. What is more, it can be eaten immediately or after a few hours when the bread pieces are soft and soggy if you like it that way, I do. It looks beautiful too with a few burned pieces of croutons in the colorful medley of vegetables. The dressing is simple and tasty. It is a great party dish if you sign up for salad ever. Original recipe had capers and used red wine vinegar, I made changes to suit my palate.

Updated 1/18: Virtual world is a much bigger place than I ever imagined. Recently I was introduced to a new startup at www.aloha.com and am excited to share a recipe with them that would inspire people to eat healthy. I am not a nutrition expert but eating healthy has always been on the menu in my kitchen. I chose the latest one I had on the blog, don't you agree that this Panzanella makes a great, healthy salad? I have made this with gluten free croutons (made with sorgham flour and flax seeds among others), and it tastes delicious. So I am pleased to share my panzanella recipe via Aloha, make this your next party dish when you meet with friends. Eat light, eat healthy, eat delicious.

What do you need to make Panzanella?
3 cups croutons/2 thick slices of bread of choice
2 Tbsp white vinegar
1/2 Tsp salt
1/2 Tsp freshly ground black pepper
3 Tbsp olive oil - divided use
1 clove of garlic - crushed
1 Tbsp chopped spring onions
5-6 fresh basil leaves - chopped fine
1 carrot - peeled & grated
8-10 grape tomatoes - sliced into half or quarters
1 cup thinly sliced or cubed tender cucumber
How do you make Panzanella? 
  • Heat a grill pan (or ordinary griddle) on medium heat.
  • Toss croutons in 1 Tbsp olive oil until they are coated and spread them in a single layer on the heated pan. 
  • Grill them for a 1 minute on each until until light brown patches start to form. 
  • Switch off and let it stand.
  • If you are using slices of bread, bush olive oil on both sides and grill them until they are firm and light brown. 
  • Once cool, cut them into bite sized cubes.  
  • Take vinegar, salt & pepper in a bowl, add chopped spring onions and let it sit for 5 minutes. 
  • Remove the soaked spring onions into a large bowl. 
  • To the remaining vinegar, add olive oil, crushed garlic and mix well.
  • Add all the vegetables into the bowl along with croutons and give a mix. 
  • Pour the vinaigrette mixture over and toss it well. 
  • Serve immediately. 
Notes: 
  • Original recipe used slices of sourdough bread. You can achieve the same effect by adjusting your vinegar or add lemon juice. 
  • Bake the bread to crispness in the oven if you do not want to do it on stove top. 
  • If you do not have vinegar in the pantry, don't sweat. Just use lemon/lime juice. 
  • Any fleshy tomatoes will work, if you want remove the seeds before using. 
  • Add a handful of thinly sliced radish for a sharp taste if you like. 
  • I have used chopped lettuce and it tastes great too.
  • Basil gives that spark of freshness in this salad, don't miss it. If not available, use fresh cilantro and mint in combination. 
  • If you want to add proteins, throw in a handful of cooked garbanzo beans. 

Thursday, January 1, 2015

Marie biscuit choco logs, good for celebration(s) - no baking needed

Hey folks,
First off, wishing all of you, Sattvaa readers, friends, well wishers a wonderfully joyous, healthy, peaceful New Year 2015! May you all keep evolving into better people and make the world around a better place to live in. Hope you all had a great time celebrating in your own personal ways to usher in a new calendar year and made some resolutions too :-). I wish you strength to live through those resolutions if that was your original resolution :-)

Having seen a few decades go by under my feet (Na, not telling you how many), I am smart enough now to not make resolutions, but enjoy every step and every small change as an achievement. Isn't that what life is supposed to be? to be alive I mean, so here is another wish coming your way to be alive and make the most for yourselves and those around you.
We are currently on vacation (and hence why there have been no posts for the last week or so :-)), did some cruising around some great, warm beaches, ate & ate till the mid line split (almost :-)) and now walking till the legs give up every night in magical lands. I am sure that is enough information for all you smart folks to guess what I have been doing, having a wonderful time of my life. I may do a separate post with some pictures on it later. Here is one for the road taken on the road until then..
And something magical happened too on this vacation, I broke out of my fear of whatever it was and braved the odds with DD & BH on every single one of the stomach churning, free fall rides through blazing sun & chilling water. There was no pre resolution here but just the mommy instinct to be with the little girl who is so quickly growing up in the hopes of catching a few more moments together. I have been patting myself on the back for all the bravery I have been showing for last 2 days (and the patting also seems to alleviate pain in the aching neck & shoulder muscles a little bit :-))

Now that I have wished you all a Happy new year, it is time for you guys to wish me Sattvaa. The blog baby completes 3 terrific years and steps into a fun filled fourth. Still a toddler but trying to be grown up. I have said this before and I say it again that when I wrote my first post on that cold Dec night breaking into the dawn of a new year, not in my rarest of rare imaginations did I think I would keep posting recipes and sharing tales with you all this long. It continues to give me pleasure to come back and write here always. It has been a great journey with ups (from 3 posts a week) & downs (shameless disappearances for days), and thank you all for staying with me and cheering me on. I have lot more recipes and tales to share, keep visiting, share the joy with friends and keep the circle growing.
Back home in India, most everyone knows and enjoys tea time. I think it is a left over from the colonization effect. Many families gather around to enjoy a cup of coffee or tea with a plate of biscuits, rusks and other snacks. 'Marie' biscuits are slightly less sweet compared to other Indian brands and favored with the hot, brewed drinks as a 'dip in'. There is something special about a biscuit dunked in hot coffee or tea and eaten before it crumbles up into a soft mass.

Here is a no brainer dessert that turns this childhood treat into is a coffee lover's piece of heaven that requires no cook time or bake time. I have a strange relation to coffee, I love, love the smell of freshly brewed coffee and that is about it, I never drink coffee since I don't enjoy the taste. At the most, my system accepts a sip or two of the cold coffee. So this dessert was perfect for me and welcome for the family who unlike me enjoy coffee. If you don't like coffee, don't get misguided by what I have said so far, the taste is very subtle and I am sure you will get carried away by the gooey chocolate and the wafer like biscuit layer in between.
I know I had a lot to say about this recipe but I am missing most of them as the thoughts are a bit 'roamy' today and I am not finding it in me to be reflective. Though the post itself may not be as juicy to read, I promise the recipe will not be a disappointment. I will see you all again in a few days as we finish up our vacation and return back home. Shall we start?
What do you need to make biscuit cake?
12 biscuits, I used Marie but any tea biscuits will do
2 Tbsp butter
4 Tbsp powdered sugar
1 Tsp vanilla essence
1 Tsp cocoa powder
1 Tsp instant coffee, I used a starbucks single serve sachet
1/2 cup cold water

How to make biscuit cake?
  • Pour the coffee powder into a bowl and add cold water into it. 
  • Let it settle & brew for a couple of minutes.
  • Melt the butter in a microwave safe bowl, add sugar and beat them together with a spoon. 
  • Add cocoa powder and fold it in. 
  • Add vanilla essence and mix. 
  • Lay a sheet of aluminium foil or parchment paper on a working surface. 
  • Take a biscuit, dip in the brewed coffee and immediately take it out. 
  • Lay it on the foil and spoon a tiny bit of the butter mixture and spread it gently. 
  • Dip the second biscuit and stack it on top of the first one, repeat spreading the butter mixture. 
  • Continue to do this for 6 (or as high as you want) biscuits. 
  • Take a generous spoon of butter mixture and apply all around the biscuits log evenly. 
  • Fold up the foil and refrigerate for 2 hours or until it hardens. 
  • Repeat for the remaining 6 biscuits.
  • Cut crosswise and enjoy the wafery, cocoa biscuits. Cover and freeze back remaining portions. 
Notes: 
  • I used nutella once but it is harder to spread. 
  • Use milk to brew coffee if you want richer taste.
  • Add finely chopped or coarsely ground roasted nuts of choice to the butter cream for a nutty crunch. 
  • Add coffee to cold liquid, as otherwise biscuits will start to crumble as soon as you dip. 
  • You can substitute the butter mixture with melted chocolate.
  • Use flavored (orange, lemon etc) tea biscuits to go adventurous.