Sunday, December 21, 2014

Double baked, pesto coated potatoes - note I don't have a proper name for this dish :-)

In all my life so far, I haven't come across a single person that says he/she didn't like potatoes. I for sure is not one of them. I am actually sad that these delicious roots get a bad rap all the time from health experts. When eaten the right way, these not only taste out of the world but also provide a multitude of nutrients. Just don't consume them as fries all the time :-)

These spuds didn't make a frequent occurrence in nammamma's kitchen, not sure why though. It was the occasional alugedde-eerulli huli (sambar made with potatoes & onions) that I craved for or the masala palya for dose. Do you ask what is so special about a sambar with potatoes & onions? My answer would be 'try it, atleast once in your life", this is a special, very special combination and the gravy just comes alive with the 'made in heaven' match of the two roots.
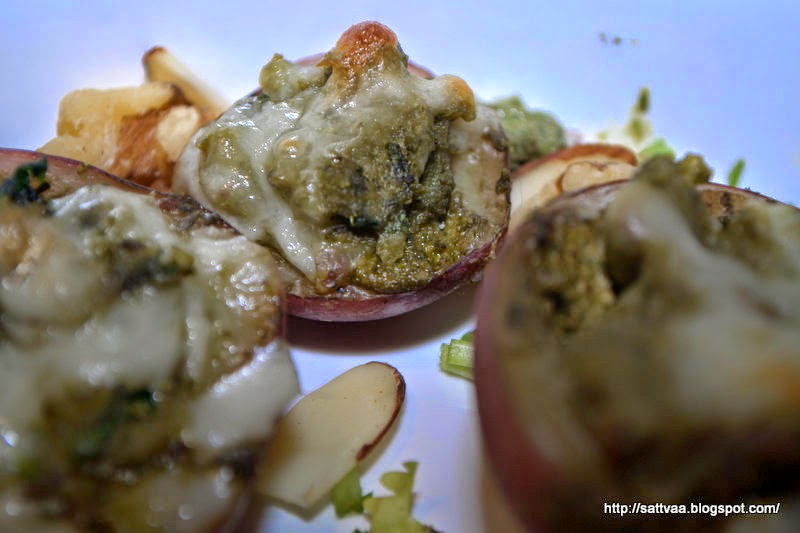
I am not talking about the huli today, nope but all this talk about potato-onion huli reminds me that I haven't made it in a while, should put it on the 'to-make' list. What I have today is an equally delicious and comforting dish made with potatoes. It meshes the freshness of mint with the bland potatoes and baking it until soft yet crispy with melted cheese on top.. I will stop describing it and give you the recipe so you can make it and enjoy too :-)

I have a MSN food app on my laptop which I visit sometimes when the picture catches my attention. A few weeks back (before Thanksgiving I think), they had many recipes apt for the season, there were a number of Turkey dishes, sweet potatoes served in many creative ways and then there was a double baked potato stuffed with more potatoes and topped with cheese :-). I loved the look of it and wanted to try it.
For the last few days, I have been busy and my usually full refrigerator & kitchen have a deserted look. With a teenager at home that feels hungry all of a sudden it has not been easy and as she was working on her never ending homework one of the weekends, she whined that there was nothing interesting to eat at home :-(. That whine sounds very familiar, if I remember right, that is the age at which nammamma gave me an ultimatum and said instead refusing to eat everything that was offered/available, I should start making what I wanted and thus happened my serious entry into the world of cooking. The conversations used to be somewhat on these lines, I would say that was hungry, amma would offer 1,2,3.. choices and I would keep saying I didn't like it or didn't feel like eating it. Amma would exasperatedly ask what I wanted to eat but I never had an answer since I didn't know it myself :-). Things always have a way of coming back.

Now though a fair complaint that is a substantially big insult to someone who calls herself a passionate cook and a blogger. So, I went into the kitchen and looked around to create something delicious and win DD back. With the image of the baked potatoes in my head, I used pesto I had made for pasta couple days back instead of following the original recipe to T. I not only coated the potatoes with the pesto but also gave some kick to the stuffing with crunchy onions and mixing some pesto into it. And viola, DD was all smiles after gorging down a plate of those baked beauties, mission accomplished :-). She is not interested in stepping into the kitchen though to make something on her own.

You can replace pesto with other chutney or sauces of choice but the nutty, minty pesto just took this a step ahead of other combinations. Give it a try and then experiment. The original recipe called for initially baking the potatoes (see the 'double baked' in the name, that is where it came from) for about 40 mins but since I didn't have the time, I opted to steam it in my rice cooker/steamer which took just 10 minutes to be done. I think baking it the first time slightly dries out the potatoes, hence the need for all the butter the original recipe called for. Steaming kept them moist and soft and I didn't use any fat other than the scant 1 Tsp oil to prepare the stuffing.
What do you need to make baked pesto potatoes? 
6-8 small (not baby) potatoes
2 Tbsp finely chopped onion
2 Tbsp grated cheese (I used mozzarella)
1/2 Tsp cumin seeds
1 Tsp oil
1/2 Tsp lime/lemon juice
for Pesto: 
2 Tbsp almonds
2 Tbsp walnuts
1 Tsp pine nuts
1 cup fresh mint leaves
1/4 cup fresh cilantro leaves
2-3 green chilies
1 tsp salt

How do you make baked pesto potatoes? 
  • Scrub the potatoes well to rid of any dirt. 
  • Cut each potato in half with the skin on. 
  • Steam or boil them in hot water until just tender. 
  • Let cool and with a sharp knife/spoon, scoop out the center of the potatoes leaving a thin layer to hold the skin. Reserve the scooped out insides. 
  • Take all ingredients listed under Pesto into a blender and using as little water as necessary, grind it into a fine paste. 
  • Add lemon/lime juice and give it a mix. 
  • Taste test and adjust salt or green chilies. 
  • Heat oil in a pan, crush cumin in palms, add it to the oil, let it sizzle. 
  • Add chopped onion and let it sweat for a minute or two. 
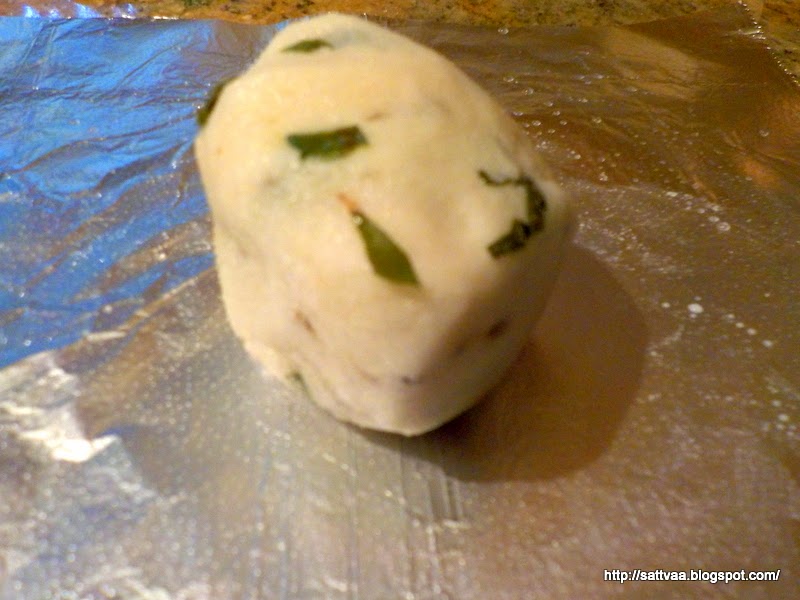
  • Mash all the scooped potatoes into a smooth dough, add it to the onion and mix well. 
  • Add couple of tbsp of pesto into this mixture and taste test it. 
  • Let it cook for just a min before switching off. 
  • Preheat the oven to 400F, prepare a cookie sheet with a baking spray. 
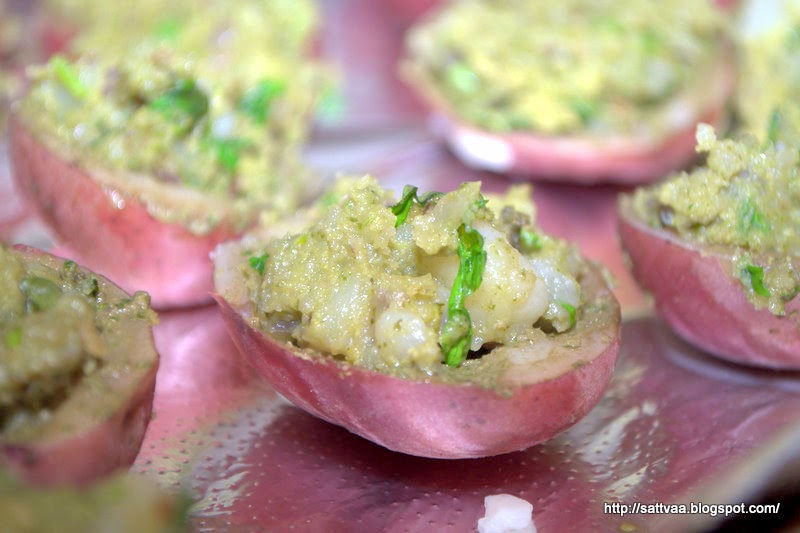
  • Take one of the potato halves, coat the insides with pesto, add a generous scoop of mashed potato mixture into the groove and stuff it in. 
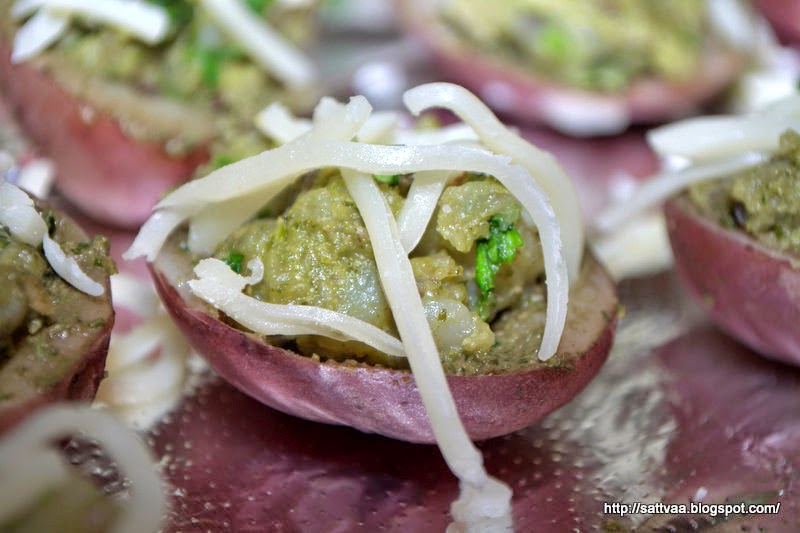
  • Top it with grated cheese. 
  • Repeat for all potato halves. 
  • Arrange them in the cookie sheet and bake for about 30 mins. 
  • Take it out and serve warm as an appetizer or a snack. 
Notes: 
  • I use small size red potatoes for this recipe, the skin is very thin. Golden russets work well too. 
  • Bring the nuts to room temperature if you freeze them like me before making pesto. 
  • Feel free to play around with nuts of choice in the pesto. 

Sunday, December 14, 2014

Pineapple pudding pops (Pineapple sajjige) - Old wine presented in a new bottle :-)

When I say Pineapple sajjige or pineapple kesari bhaath, I know many of you will nod your head to indicate you understood exactly what I was talking about. Which is indicative of the fact that, you all have either an Indian root or a frequent foot in an Indian kitchen. What if I had to introduce a dish to a group of friends that may not know what sajjige or kesari bhaath is, how do I explain it to a first timer trying this decadent, delicious dessert? I just packaged my old wine (aka, pineapple kesari bhaath) in a new bottle (measuring spoons) for presentation and global acceptance :-). My tiny effort at bringing this fast shrinking world together.
Here is the story from the very beginning(I know you are all eager to hear it), with holidays fast approaching, we have an annual holiday party at work to celebrate, share and enjoy good food and company. Infact we had it last week and as part of the celebrations, there was a dessert contest. I being the enthusiastic foodie (and the blogger), wanted to take a dish but ruled out all the typical holiday cakes, cookies etc since there are other very talented cooks on the floor. Thought I would introduce an Indian sweet to this very diverse and open group of people I work with and the first one that met the criteria (not on the blog already :-), easy and quick to make on a weekday night and stays fresh the next day) was the pineapple kesari bhaath. Since the name was a mouthful, I put my entry in as pineapple pudding pops (no idea where the 'pops' popped from) but then had to keep true to the name and so ended up presenting them as small blobs shaped by measuring spoons :-). Surprise, surprise, here is how the contest ended :-)
When I sent the above picture to DD & BH, their first chorus reactions was, "What? you got a prize for the kesari bhaath? and they called it a creative entry?", There is nothing wrong in that reaction since sajjige of the banana kind or the pineapple kind has been our regular Saturday morning dessert (all in the name of offering to the God) for many years now and DD is a die hard fan of this soft, decadent, fruity dessert. I stick to it because of its simplicity and ease of making the dish. So, they were both non believers when I said my humble kesari bhaath/sajjige won a prize in a dessert competition. When I came home, DD was like, "mom, if anyone should be given a most creative dessert for this dish, they should go and find a grandma atleast 4 generations back, she is right, I didn't invent it :-).
On the other hand, it is perfectly normal that it was named the most creative dish in a sea of entries made of the regular chocolate cookies, red velvet cakes and other such seasonal desserts. What can I say? the judges were blown away by this delicious dessert and I am just glad I got recognized :-)
This is not a common dish from nammamma's kitchen like most of my traditional dishes are. Instead, I learnt it from a cousin sister in law who had made this when we stopped over at their place in Chikmagalur many years back. Not only did she feed us until we were ready to fall over, she also packed a big, steel box full of ghee oozing, saffron flavored, pineapple kesari bhaath when we headed out on our way to Sringeri. I remember we had enjoyed the delicious kesari bhaath for over two days (it keeps well even outside refrigerator if the weather is mildly cold). This is many moons ago, I was in college and it was a very rare trip we had taken up as family and my father had taken us kids to our native village (I carry the initials as part of my name but never had visited the place until then). All great experiences and memories. It is a trip I will never forget for many reasons and the kesari bhaath made the memories all the more sweet.
We are not a family of sweet people :-), ok, what I actually meant is this - we are not a family of people that LOVE sweets. There are only so many sweets that actually entice us and this simple, homely yet deliciously fruity dessert is very close to our hearts and we invariably go back to it all the time. Hope you like it as much as I do. 
What do you need to make pineapple kesari bhaath? 
1 cup upma rava/sooji
1.5 cups water
1 cup milk
3/4 cup sugar (adjust based on the sweetness of pineapple)
1+1/4 cup chopped pineapple
7-8 strands of saffron
4 Tbsp ghee (clarified butter)
1 Tbsp cashew nuts
1 Tbsp raisins

How do you make pineapple kesari bhaath? 

  • Clean pineapple of any thorns and chop into small bits. I like making this with fresh pineapple. 
  • Bring 1/2 cup water to a gentle boil with sugar and when the bubbles start to form, add the chopped pineapple along with any juice. 
  • Cook for 2 minutes, switch off, cover and keep aside until ready to use.
  • Soak the saffron strands in a Tbsp of warm milk and keep it aside to infuse flavors.
  • In a deep pan, add 1/2 Tbsp ghee and heat it. 
  • Add cashews and raisins and roast them until raisins plump up and cashews turn golden brown. 
  • Take them aside into a plate. 
  • In the same pan, add another 1/2 Tbsp ghee, add the rava/sooji and start to roast it on medium heat, continuously stirring for uniform heat distribution. 
  • Add another Tbsp of ghee after 3-4 minutes and continue to roast. 
  • The roasting will take about 7-8 minutes depending on the amount of heat, it is good to do it on low/medium heat and not burn the sooji. 
  • As it roasts, the sooji turns lighter (you will feel it when you turn it over with the spoon) and starts to give out a nice roasted aroma. 
  • When the sooji turns light golden and loses the raw smell, turn the heat all the way to low, add the pineapple & sugar syrup. 
  • Keep stirring the mixture continuously not to form lumps and immediately add the remaining water and milk and mix it well. 
  • Add the saffron along with the milk it is soaked in. 
  • Add the remaining ghee on top, turn the heat up just a little, cover and let cook undisturbed for 10 minutes.
  • When you open the cover, the entire mixture should be a fluffy, soft mass and smell delicious. 
  • Switch off, garnish with the roasted cashews and raisins, mix and serve warm or cool. 
Notes: 
  • You can use canned pineapple if you prefer but make sure, you wash it a couple of times in running water to rid of the juice and preservatives. 
  • You can add pineapple & sugar directly into the roasted sooji but this sometimes leaves a very faint bitter taste as pineapple doesn't cook completely. 
  • You can add a pinch of powdered cardamom towards the end for flavor, I like to keep saffron & cardamom separate in my desserts and give them their own individual space. 
  • I always add milk to my kesari bhaath to make it rich and tastier, if you prefer, just use water. 
  • We like soft kesari bhaath and the 1:2.5 ratio of rava:liquid works fine. 
  • Use upma rava (coarser variety) for the kesari bhaath, the finer varieties make it pasty. 

Sunday, December 7, 2014

(Akki) Rave rotti - deliciousness is just a few ingredients away

The humble Akki rotti from Karnataka, called Thalipeeth in Maharashtra has gained popularity due to its deliciousness and versatility. Some like it thin and crunchy while others prefer it thick and crispy. You can make akki rotti with different vegetables (grated carrots, radish, chopped dill, cooked avarekalu), go fancy with it or make a bare bones, no frills but extremely delicious akki rotti like my parents make. Ask any kannadiga for their favorite comfort food, I can bet akki rotti would top the list.
Yesterday, we were at a dinner party hosted by a friend and DD decided to make a dessert herself and take it, it was a sweet potato & marshmallow bake and the kids loved it. So a friend asked me if I was training her, to which I said 'No'. The more I think of it, nammamma never 'trained' me either but there was so much cooking and eating in her kitchen, I kind of naturally grew interested in it. I see the daughter doesn't have the same enthusiasm as me when it comes to cooking but some of her experiments are an indication that she can cook to get her out of starvation if a situation arises anytime. And given her impeccable taste to differentiate good food from the bad, I am sure she will cook something good :-). I think that is more than good enough for a starter.

When we were kids, kitchen was mostly nammamma's kingdom. Though we all rushed in and out at various times, gobbling food of all sorts, amma would be the one mostly toiling in there ensuring the never ending supply of food. My father was a foodie (Hmm, apples don't fall too far from the tree :-)), he enjoyed good food and was a good cook himself. But anna's cooking was limited to those rare occasions when amma was out or sick and he had to feed us, the hungry kids. We as kids (atleast I am sure I did) waited for those nights when anna would be in the kitchen instead of amma because he wouldn't make the regular fare of rice, saaru/huli etc instead it would be a treat to have his thick, crispy and light as feather akki rottis. Anna also made a majjige huli to die for, the not too thick, not too thin, creamy consistency of the majjige huli in sour yogurt made us feel at home in an 'amma-missing' kitchen.
But what I loved most and I know all my siblings will nod their heads in unison was his akki rotti. He would mix the dough enough for just 2 (huge) rottis instead of making multiple smaller ones and waste the time in the kitchen. The dough would be mixed with just rice flour, cumin, salt, chopped green chilies and lotsa of grated fresh coconut (Yep, though neither of them owned a coconut grove, my parents used coconuts as if it grew in the backyard :-)). No onion, no other fancy stuff. He would mix the dough, divide into 2 big balls, use the huge aeroplane pan(called thus because it is made from a metal used to make aircraft bodies and distributes heat evenly), pat the ball gently into a thick circle and cook it with lot of patience and love, turning the bandle (deeper & circular compared to a flat griddle) all around so the rotti would come out crisp with a golden color all over, it would be cooked just on one side, no flipping it over and when it came out it resembled a deep dish with golden spots all over the bottom surface.

Once both were done, he would divide them with mathematical precision into pieces and give it to all of us, I can't put into words how much I miss those days and the rotti. We called them biscuit (more like 'bisket' or 'biskattu' in Kannada) rotti. There is a biscuit roti popular in South Karnataka that has no relation to this, I will talk about it another day. Being an ardent fan of akki rottis, I have tried to recreate the magic in my kitchen ever since I started one but it somehow doesn't taste the same as the ones we ate as kids. BH, though never had akki rotti before marriage is a convert and loves to eat his with a cup of home made yogurt. DD loves some avakkayi mixed with yogurt to go with her akki rotti :-)
One of the things I find different with my ingredients is that Nammamma got her rice flour made to order :-), she would take the rice to the flour mill and get it ground into a powder of the right coarseness and I don't have that luxury with my store bought powders. She always says the rice flour for the rotti needs to be very slightly coarse and not a fine powder to give that crisp texture to it. So when I came home with a packet of finer than usual rice rava (it was MTR brand if you are interested), I decided to give it a try. The rice rava doesn't hold together if you mixed it with water directly as there is no gluten in it, so I ended up pre cooking it just a bit. This also makes the rotti turn out lighter. The recipe has no bearing to how anna made the rottis but just the texture of it reminded me of those days. It is an improvisation from what he made, to make up for the absence of coconut, I added a seasoning in the beginning. Also, since a deep dish skillet doesn't work on my electric coil stove, I use a flat cast iron griddle. Made small palm sized rottis just to relive a memory :-). These are very easy and quick to make, taste delicious on their own or with a spicy dip on the side. You can make this rave at home, how to is part of this post.

What do you need to make Akki Rave rotti? 
1 cup rice rava (Idli rava)
1+1/4 cup water
1/2 Tsp salt (adjust to taste)
2 green chilies
1/2 Tsp mustard
1/2 Tsp cumin
1/8 Tsp asafoetida
4-6 finely chopped curry leaves
2 Tbsp oil - divided use

How do you make Akki Rave rotti? 
  • Heat a sauce pan on medium heat along with 1 Tbsp of oil.
  • Add mustard, cumin and let them pop.
  • Add finely chopped green chilies, curry leaves and fry for about 30 seconds. 
  • Add asafoetida, salt and water. 
  • Cover and let the water come to a gentle boil. 
  • Reduce heat to low, and in a steady stream add the rice rava into the boiling water while stirring with a spatula to avoid lumps. 
  • Cover and let cook on low heat for 2 minutes. Switch off and let stand for 2-3 minutes until cool enough to handle. 
  • Take a plastic sheet or aluminium foil, sprinkle a few drops of water and spread it evenly on the surface. 
  • Take an apple sized dough on to the sheet, dip your palms in cold water and knead it into a smooth dough (about 30 secs)
  • Keep your griddle to heat on medium heat. 
  • Pinch off balls of the desired size from the kneaded dough and pat them into a flat disc of about 1/2mm thick. 
  • Transfer one or more of these flattened discs onto the hot griddle leaving an inch or so of space in between to easily flip them over. 
  • Add drops of oil on the surface and cook them for a minute and half or until the bottom layer turns light brown. 
  • Flip over and cook until both surfaces get the desired color and crispness. 
  • Serve it with a dab of ghee (clarified butter)
Notes: 
  • Fresh rava made at home tastes best (then, you knew I say that everytime :-)), if not realistic, use the idli rava from the store. 
  • You can add chopped cilantro instead of curry leaves. 
  • I would keep this recipe saatvik with no onions because it reminds me of my anna's biskattu rotti. 
  • Keep the dough covered to prevent it from drying as you are working in batches. 
  • Some varieties of rice rava may need little lesser or more water, when you are done cooking, you should have a moist dough that comes together. Adjust with a few sprinkles of water or a spoon of rava as needed.