Thursday, March 29, 2012

Mango Rice or Mavinakayi Chitranna for Ugadi

We are into the week after Ugadi but I am still posting about my Ugadi menu :-). That is the spirit right? stretching the joys of life as long as you can. But this will be my last of the posts for 2012 Ugadi.

In Karnataka, mango rice or mavinakayi chitranna is made a few different ways, the one I have today is my favorite, it is called hasi saasive (raw mustard) mango rice. The marriage of raw mustard and sour green mangoes in this rice dish is heavenly.

Growing up I had seen nammamma choose different varieties of green mango for different purposes, she would want the really sour ones for pickling and chitranna while the tender, sweeter ones would be cut up and smeared with spices and eaten just like that :-). I don't have so much choice here so I pick the green mangoes of any size and shape and hope it does the trick. I had got some really nice green mangoes this time around Ugadi and gladly used it in Ugadi pachadi, Mango Dal and Mango Chitranna.

What do you need to make Mango rice? 
2 cups of cooked rice - use sona masoori or similar varieties
1 medium sized green mango - washed, peeled and grated about 2 cups of gratings
1 Tblsp mustard seeds
4-5 dry red chilies
3 Tblsp of grated coconut (fresh or frozen)
1 Tblsp salt (adjust to taste)
1 Tsp cooking oil
For vagagrane/seasoning: 
1 Tblsp cooking oil
1 Tsp mustard seeds/saasive
1 Tblsp chana dal
2 Tblsp raw peanuts
1 sprig of curry leaves (5-6 leaves)
1/2 Tsp turmeric powder

How do you make Mango rice? 
  • Take red chilies and mustard seeds into a blender and pulse it a few times to break the mustard seeds. 
  • Add grated mango reserving 1 Tblsp of it for garnish, coconut, salt and a Tblsp of water and grind it into a chutney like consistency. 
  • Heat a pan on medium heat, add a Tsp of oil and pour the ground chutney into it. 
  • Stir frequently on medium heat until water evaporates and raw mustard smell goes away. 
  • Cook rice so the grains are separate. 
  • Spread the rice to cool down in a large bowl. Pour the chutney on top of the rice and let it cool down completely. 
  • Prepare vaggarane - Heat oil in a pan, add mustard, chana dal and peanuts and fry till mustard and peanuts pop. 
  • Switch off and add turmeric powder and curry leaves. 
  • Pour the sizzling vaggarane on top of the rice and gently work the chutney and vaggarane into the rice taking care not to mush up the rice. 
  • Garnish with the reserved mango gratings at the end.
  • Let the mango rice sit for about 30 minutes before serving. 
Tips:
  • Add a couple of drops of oil while cooking rice to get fluffy, grain-separated rice. 
  • The chutney when you grind it should be strong in spices as it mellows down on mixing with rice. Adjust red chilies, salt or mango to suit your taste. 
  • Use additional red chili powder if you want it spicier but note that mustard gives a strong flavor to the rice and you do not want to over power it with the chilies.
  • The sourness comes from the mango, choose firm, green mangoes that are tart in taste. 
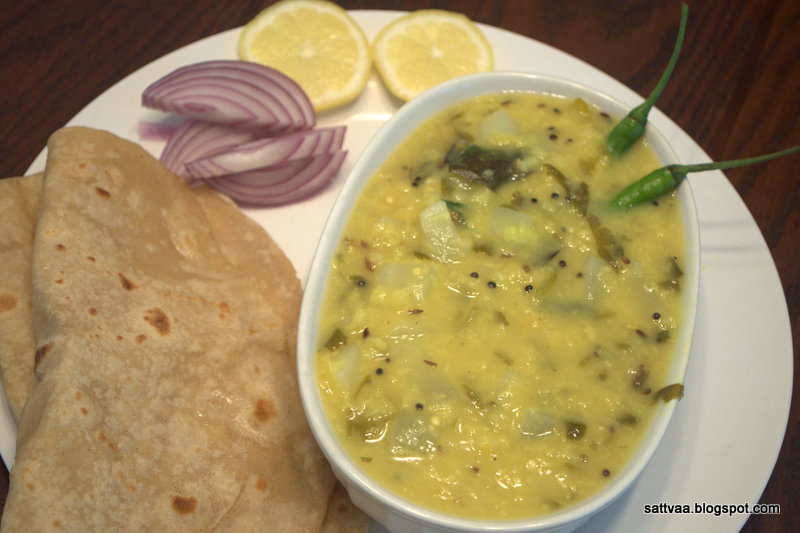
Here is another look at my Ugadi platter


Sunday, March 25, 2012

Ugadi obbattu

In Karnataka, Ugadi & bele (Dal) obbattu have an unspoken camaraderie. Though we love obbattus any day of the year, Ugadi becomes an excuse to make this slightly labor intensive but extremely delicious traditional sweet.

There are 2 very popular kinds of obbattus - one is the bele/dal/lentils obbattu and the other kaayi/coconut obbattu. It is essentially a sweet stuffing inside an outer cover and roasted on tava. The bele obbattu is made with a mixture of chanadal and toor dal in some homes but we always liked nammamma's recipe which had only chana dal and that is what I make too.

A good obbattu is measured in three dimensions - first is by the way the layers are formed when cooked, second by the thinness (notice, I don't say thickness, the thinner you are able to spread the obbattu out, the better it is) and the softness of the obbattu (Anna always said, 'this obbattu is like the Mysore silk seere' when eating nammamma's obbattu which meant the obbattus were as soft and silky as the famous Mysore silk sarees :-)). I kept thinking about my dad looking at the way my obbattus were puffing up on the tava, missing him all the time.., food and cooking is all about memories.. don't you agree?
Because of the work it takes, obbattu is typically considered as big league cooking reserved for experienced cooks. For a long time, I had put off making it in my kitchen as I always thought it was a skill I didn't have and one day it all changed when we went to a festival dinner at one of our friends house. The lovely couple V & S are both experts at cooking and have been very popular for their delicious mysore paks and bondas in the friend's circle but for the first time that day, I saw someone closer to my age group make a 100 obbattus in addition to all the other wonderful dishes she had made. So it dawned on me that I wasn't too young to make obbattus :-) and if I wanted, I just had to jump in and try it myself. I have missed a perfect obbattu in the past but this Ugadi turned out fabulously with the obbattus and here I am confidently sharing what I did.

What do you need to make bele obbattu? 
NOTE: The below proportion made 18 good size obbattus
For Hoorana or the stuffing:
3 cups chana dal/kadle bele
3 cups of crushed or grated jaggery
4 green cardamon - peeled and powdered or use a Tsp of cardamom powder
1/2 nutmeg broken into 2 or 1/2 Tsp of nutmeg powder
1 inch piece of cinnamon stick
2 cups of water to cook

For Kanaka or outer covering:
2 cups wheat flour
1 cup maida
1 cup chiroti rava (also called bombay rava or sooji)
1/2 Tsp salt
1/2 cup cooking oil

How do you make bele obbattu? 
Hoorana making: 
  • Wash and soak chana dal in water for about 4 hours. 
  • Clean the dal in 2-3 changes of water, pressure cook it until very soft with the nutmeg and cinnamon pieces. 
  • Once the cooker cools, open the lid and strain the water out. NOTE: the amount of water I have mentioned above didn't leave a lot of extra water and so I didn't have to strain it. 
  • Mash the dal once with a potato masher or a thick spoon. 
  • Take the dal and grated/crushed jaggery in a heavy bottom pan and heat it on medium heat. 
  • Jaggery dissolves and leaves some water, keep stirring frequently until the water dissolves and you see a single blob of dal in the pan leaving the sides. This took about 15 minutes for the amount specified. 
  • Switch off and let it cool, fish out the cinnamon & nutmeg pieces at this stage and discard them.
  • I have tried using the blender/mixer and my stone grinder for grinding the hoorana but since both these methods require some water to make them work, it is tricky. Nammamma put this into the traditional manual stone grinder (Varalu kallu) but here is a very easy way to do it.
  • Take handfuls of the cooled & slightly dry mixture and grate it in your grater and you will get smooth noodle like output which is completely soft without a trace of dal in it. 
  • Make the hoorana into lime sized balls, I got 18 balls for the above mentioned quantity. 
Kanaka making: 
  • Put all three dry flours into a wide bowl, add salt and a Tsp of oil and mix it well. 
  • Add water slowly and make a soft dough, similar to the paratha dough. 
  • Cover it with a wet dish cloth or paper towel and leave it aside for an hour. 
  • Take the dough out and knead it for atleast 15 minutes adding a Tsp of oil every 5 minutes. 
  • Your dough will turn completely soft and pliable at this point. 
  • Cover it with a wet cloth and let it rest for another hour. 
  • Make lime sized balls by pinching portions of the dough and shape them into a smooth ball. 
Stuffing the hoorana: 
  • This is similar to paratha stuffing, smear your palm with a drop of oil, put a ball of kanaka and pat in into a small disc.
  • Place the hoorana ball in the center of the disc, close the ball with the kanaka covering by gently working the kanaka upwards and over the hoorana ball. 
  • Smoothen the stuffed ball. 
Obbattu making: 
  • In Kannada it is called 'Obbattu tattodu' which means pat the obbattu and not actually roll it like a chapathi. 
  • Take an aluminium foil sheet, put a drop of oil and spread it on the sheet with your hand. 
  • Place the stuffed obbattu ball in the center of the sheet and start patting it into a round disc of even thickness. 
  • The trick is to move the sheet and your hand in unison so the obbattu expands in all directions uniformly. 
  • Take it all the way without tearing the obbattu. 
  • Heat a flat pan (preferably cast iron) on medium heat and put a couple of drops of oil and prepare the pan. 
  • Put the aluminium foil with the obbattu side facing down and let it sit for a minute. 
  • Now gently remove the aluminium foil by lifting a corner, use a flat spatula to coax the sheet off the tava if you need to. 
  • Once you see bubbles appearing on the top surface of obbattu, gently turn it over to the other side and let it roast till it turns golden brown with a few spots.
  • Serve hot obbattus with ghee, we love soaking obbattu in warm milk, try that combination for a great sleep inducing meal.
Tips: 
  • Soaking chana dal helps cook it soft. 
  • Do not heat the mixture of dal & jaggery too much, else it will turn into a burfi consistency and cannot be stuffed or rolled out into obbattu.
  • I prepared the hoorana the previous evening and made the rest on Ugadi day. 
  • During the obbattu patting process, the trick is to make sure the hoorana inside is moving uniformly as you move the obbattu all the way to the edge to avoid the edges from becoming hard after roasting. 
  • When you mix the dal and jaggery, taste to see if the sweetness is right for you, sometimes the sweetness of jaggery changes the proportion.
  • Every time, before patting the obbattu on the sheet, put a couple of drops of oil and spread it over the sheet. I used 2 sheets alternately. 
  • I used kanaka balls slightly smaller than hoorana balls which worked very well in the final product.
  • If you feel comfortable using a chapathi roller, go ahead and use it to make the obbattu but do use it delicately so the hoorana doesn't spill out. 


Friday, March 23, 2012

Ugadi Pachadi - Life is a mixture of varied experiences

Ugadi/Yugadi is celebrated as the beginning of New Year. The festival celebrates the onset of Spring when everything in nature wakes up from the winter hibernation and starts a new life. I am definitely seeing changes around me that whispers Spring, warmer weather, exploding colors.. This is an unexpected beauty from my front yard and I am thankful for the previous owners of the house. A week back we noticed the blooms and all of a sudden there was this tender, beautiful pink bloom and they are all over the plant now.
In Karnataka, we eat a mixture of bevu-bella (Neem-jaggery) on this day symbolizing the two sides of the coin that is life, bevu/neem represents the 'not so good or bitter' experiences in life while bella is for all that is sweet and prosperous in life. I vividly remember the early morning baths on Ugadi day, the green mango leaves torana (decoration on the front door) and the bevu-bella eating. There was a huge neem tree in the back yard of one of our immediate neighbors and the previous day, they would cut branches with fresh leaves and blooms and distribute it to all. Nammamma picked the fresh new neem flowers and mixed them with ghee and grated jaggery and we ate the bitter-sweet mixture. Though you are supposed to welcome both sweet and bitter experiences equally, nammamma's mixture always had lots more of the sweet and a little bit of the bitter wishing her family a Happy New Year :-). Lunch spread on Ugadi almost always had mango chitranna and bele obbattu and get extended to many other delicacies if there were guests.
I learnt making the Andhra Ugadi Pachadi from amma after my wedding, the first time I had it was a 'love at first bite'. The pachadi is a burst of perfectly blended flavors, my daughter wants to eat it on any day of the year if only her mom would make it :-). This pachadi is a mixture of neem flowers, jaggery, tamarind, pieces of green mango, banana and salt. One of my Telugu friends also adds a pinch of red chili powder to bring the taste into the pachadi. As you can see the Ugadi pachadi is a conglomeration of bitter, sweet, tart and salty tastes. We have had nothing but bowls of Ugadi pachadi in the mornings filling us well until lunch is ready.
My experience of getting neem flowers in the local Indian grocery store has been very varied, some years I have been completely out of luck with it and have used powdered fenugreek seeds in my Ugadi pachadi, some years it has been great with my grocery store owner getting fresh neem leaves and flowers. So I have learnt to make the best of what is doled out to me on the day prior to Ugadi, I usually go shopping without setting the bars too high :-).

So yesterday evening was a new experience, the store was crowded as expected as it was not only the eve of Ugadi but also the day of the week the local store gets fresh vegetables. I didn't spot any neem in the aisles and was telling myself that it would be a fenugreek pachadi when one of the ladies that works in the store came around. I asked her if they carried neem flowers and she said 'Yes, ask for it when you check out, they have it at the front'. Yay, I was so happy and came to the checkout, I asked the lady for neem flowers and she handed me a small packet which had some very dark brown pieces inside, I repeated myself that I wanted neem flowers, she took the packet back and handed me another identical in size packet which had light brown thingies inside :-). That is when I realized they were selling dried neem flowers and for a premium, well I bought one of those and carried the treasure home like a grinning monkey though my dreams of fresh green leaves and flowers were squashed right there. In the spirit of Ugadi, accepting what I got I made a great Ugadi pachadi with the precious neem flowers and we had bowlfuls of it the whole day.

What do you need to make Ugadi Pachadi? 
2 ripe bananas - peeled and cut into small pieces
1 medium sized green mango - washed, peeled and chopped into small pieces
1 cup of crushed jaggery
1 Tblsp of neem flowers - crush them a little between your fingers
1/2 Tsp salt
1 Tsp of tamarind juice - soak a small piece of tamarind in water for 20 minutes and extract the juice
How do you make Ugadi Pachadi?
Mix all the ingredients in a bowl, set aside for 10 minutes for the juices to socialize with each other before spooning into the mouth. Enjoy a very healthy, tasty Ugadi pachadi.

And here is a quick peek at what we had for our Ugadi habba today, recipes will follow
Mango chitranna, carrot kosambari, chikkudukaya-potato palya, ugadi pachadi, mango pappu, obbattu hoorana (yes obbattu is coming) and anna in the center served with papads

Thursday, March 22, 2012

Wishing everyone a Very Happy Ugadi!

Yuga Yugadi kaledaru
Yugadi marali barutide
Hosa varushake hosa harushava
Hosatu Hosatu tarutide

This is a very famous poem by one of my favorite Kannada poets & Jnanapeeth awardee Dr. D.R Bendre.

Yugadi/Ugadi is the beginning of New Year in Karnataka, Andhra Pradesh, Maharastra, tomorrow's celebration is called Chandramana Ugadi as it is based on the lunar calendar. Indian calender has names for every year and the year beginning tomorrow is called 'Nandana'

Very rough translation:  
A New Year returns once again and brings new joy to a new beginning.

I wish all my readers a Very Happy, Prosperous Nandana Naama Samvatsara(Year)

I will be back with Ugadi specials from Sattvaa kitchen after tomorrow. See you all then.

Tuesday, March 20, 2012

Moolangi(radish) tovve - A dal recipe so comforting you will forget it has radish

Do any of you have experience carrying a (cooked) radish dish in lunch box to school/college/work? I did that once, had made mulangi(radish) huli at home and took it to work with rice. Honestly, I was amazed that until then I had not realized that a lunch box could stink, am glad I opened the lunch box when no one was around and immediately closed it. Came back home famished, heated up the dabba food and ate it licking my fingers :-). Nammamma though never carried any lunch boxes knew something about unleashing a radish dish from a closed vessel, how else do you explain the strange coincidence in all the years she made my lunch box, never once it had the radish huli or gojju.. Moms are really smart.

But, I do like radishes, I eat them both raw and cooked. Nammamma's typical moolangi dishes would be huli (Yumm, I have to blog about it soon), gojju and the huli tovve and I like all three of them. I had not seen red radishes until I traveled across the seven seas (well, just pacific ocean) and fell in love with those cute little bulbs in the farmer markets. They are not as spicy/pungent as the regular radishes and work extremely well in salads. I trim the ends and use them in huli/sambar for a fragrant side dish :-).

Tovve is a quintessential kannada dish you will find on the typical festival or wedding menu, though radish doesn't fare as a favorite on certain days, it does make a wonderful tovve that goes well with both rice and rotis. I like white radish for this recipe because for me tovve is as much about the yellow green color as it is the taste, feel free to use red radishes as substitutes and try this simple recipe for a delicious meal.
What do you need to make radish tovve? 
1 cup moong dal/hesaru bele
1 medium sized white radish - washed, peeled and chopped into bite size pieces
1.5 Tsp salt (adjust to taste)
2 green chilies - slit length wise
handful of fresh cilantro
1/2 Tsp turmeric
2 lemons/lime - juice extracted
3 cups of water
For vaggarane/seasoning:
1 Tsp cooking oil
1 Tsp mustard seeds/saasive
1 Tsp cumin/jeerige
1/2 Tsp asafoetida powder
3-4 curry leaves

How do you make radish tovve? 
  • Wash the moong dal in 2 changes of water and bring it to boil in a vessel.
  • Add the radish pieces and green chilies when the moong dal starts to boil and cook them for about 10 minutes on medium heat. 
  • About 5 minutes after adding the radish pieces, add finely chopped cilantro and let it boil with the dal & vegetables. 
  • When the dal & radish turn soft to touch but hold their shape well, add salt and turmeric, switch off the stove.
  • Prepare seasoning - heat oil in a small pan, add asafoetida, mustard and cumin, wait for the mustard to pop and switch off the stove. 
  • Add curry leaves into the hot seasoning and pour all of it into the tovve. 
  • Add the lemon/lime juice and mix well.
  • Serve hot or warm tovve with rice or rotis, we had ours with chapatis. 
Tips: 
  • Be generous with lemon/lime juice in the tovve recipe.
  • Adjust tovve consistency to be thick. 
  • Make sure you do not cook the dal too long, it just has to be soft, you want to taste and feel the soft dal with every bite. 

Friday, March 16, 2012

Rave idli or is it Rava idly - definitely not the MTR mix

Don't get me wrong, I love MTR brand, it has been my go to amma for many masala powders when I don't have the energy/time to make it at home. I trust them to be a close replacement for my masalas and hope they will continue to hold up the standards of their products always. However, my patronizing does not extend to their line of ready to eat mixes, I find no cost or time saving in bringing home the vada mix, rava idli mix or the rava dose mix etc. The other reason is that we are hearty eaters at home and I am not used to heating up one cup servings of dishes :-). I can list a whole bunch of advantages to making these at home - you know exactly what goes into the final product, flexibility to vary ingredients to please your near & dear ones to name some..
I am sure you will all agree that it is not cost effective (come on, MTR is a for profit company, they are not running charity) but do you believe you won't need much time to prepare delicious, melt in the mouth rave idlis, all it takes is a little bit of planning and working together in the kitchen. The key ingredient required is good sour curds(yogurt) without which you will probably not get good idlis even if you used the branded mix.

Long back, when I was just out of college and my parents took on the task of finding me my BH, I had gone to meet a prospective groom. Nammamma made rave idlis for brunch  that day as we were leaving before lunch, for some reason the rave idlis all turned out placid and had a yellow tinge making nammamma tearful. Though she didn't say anything at that time as we hurried out to meet the guy, she blurted out after a week 'I knew this wouldn't work out when the rave idlis didn't come out good', I gaped at her for a minute before I made sense of what she was saying and then laughed out aloud :-).
She took the badly turned rave idlis as a sign for the following event but the reason the idlis turned out pathetic that day was because she was out of the fluffing agent (cooking soda) and didn't have sour curds for the recipe, also turns out she mixed everything with a turmeric coated hand which explains the color of the idlis. No harm done, I found BH soon after that which turned out fabulously though there were no rave idlis involved in making it happen :-)).

Before you start on the rave idlis, make sure you have a day or two old curds (preferably home made) and cooking soda on hand. 
What do you need to make Rave idli? 
Makes about 15-18 rave idlis
2 cups upma rava/uppittu rave
1 cup sour yogurt - whisked smooth
2 carrots - peeled & grated
handful of cilantro - chopped fine
1 Tblsp salt (adjust to taste)
1 Tblsp grated coconut - fresh or frozen (optional)
1 Tsp cooking soda
Seasoning:
1 Tblsp chana dal/kadle bele
1 Tblsp (6-8) cashew nuts
1 Tsp black pepper corns
1 Tsp ghee/clarified butter
How do you make rave idli?
  • Dry roast the upma rave on medium heat until it is slightly pinkish and gives a toasty smell,  Let it cool.
  • Heat the ghee on medium, add chana dal, pepper corns and cashew nuts and roast them until the nuts and dal turn light brown.
  • Add grated carrot, prepared seasoning, salt and cooking soda to the roasted rave. 
  • Add coconut if using, mix everything together. 
  • Put drops of oil into your idli plates and prepare them.
  • Mix yogurt little by little and bring it to the regular idli dough consistency, scoop it into the idli plates. If your idli stand cannot hold all the idlis in one go, you do not want to mix yogurt at once because combination of yogurt and cooking soda works together the longer you leave them outside and renders the idlis limp. 
  • Steam the idlis (no weight or whistle) for 20 minutes, for perfectly done idlis, a toothpick inserted should come clean.  
  • Let the idlis stand for 5 minutes off heat before removing them from the idli plate. 
  • Classic Karnataka resturant menu is rave idli with potato sagu and chutney, I made peanut chutney with it.
  • Serve delicious home made idlis with your choice of side dish.
Variations: 
  • Sometimes I skip grated carrot but increase the chopped cilantro to get a different fresh flavor. 
Tips: 
  • Roasted rave can be stored for a long time and comes in handy for quick uppittu, rave idli etc. I usually roast the rave when I bring it from the store. Roasting also extends the shelf life of rave.
  • If you are roasting rave on the stove, you will feel the difference as it gets done. In the beginning as you stir it, it feels very heavy on the spoon however roasted rave becomes very light when you mix it.
  • Alternatively, you can spread rave in a microwave safe plate and MW it for 2+1+1 minute, taking it out to give it a stir. This timing works for my MW power setting and 2 cups of rave. Use your judgment in your kitchen.
  • If your yogurt is very thick, add about 1/2 - 3/4 cup water while whisking it smooth. When you mix in the yogurt, the resulting consistency should be that of the regular idlis.

Wednesday, March 14, 2012

Greens galore - Sabsige soppu (Dill leaves) kootu

While we enjoyed the faux-summer created with the Mango pappu earlier this week at home, reality strikes when you see outside and notice a cloudy sky and the chilly breeze. Yesterday was honestly crazy when mother nature thought of showing all her capabilities within a span of 30 minutes, I saw 5 minutes of rain coming straight down switching to 5 minutes of hard hails followed by the white fluffy snow and within the next 5 minutes, there was the glorious Sun smiling. I was sitting inside my closed car waiting for DD to finish up her sports practice. It was like the weather couldn't make up its mind or asking for help deciding. All the time I was sitting inside the car, I was amazed as much at the fickle changes in the sky as at the tenacity of the kids playing in the rough weather.

So when the weather is cloudy, gloomy and cold, we need something to warm up the system from inside. Kootu is such a comforting recipe for this season especially with the pepper and its super medicinal benefits. When we visited India last summer, dear friend M gave me some home grown (read farm house grown) dried black pepper. The amount she gave me was so huge that it will last me for a long long time, but looking at those fresh, strong smelling pepper corns I decided to take the entire offer (yes, I hoard quality ingredients). It is so flavorful and stood apart from all the store bought pepper corns I have used over the years. Thanks M, I have preserved the packets in the deep freezer and take out only what I need :-) and now I know where to go when the stock needs replenishing.

I generally use the kootu to throw in vegetables so I can get two things done at once but today's kootu is special as I am sending it to Vardhini's monthly event featuring greens. She asked for greens based recipes, I love greens, and here comes the first one. Dill has a strong flavor unlike the mild spinach or amarnath and works well in few specific recipes. I use them in kootu, bassaru (recipe to follow), akki rotti, masala breads so I can taste and smell the distinct Dill flavor. The comforting Sabsige soppu kootu recipe for a cold day is from nammamma's kitchen.
What do you need to make Dill leaves kootu? 
1 cup Toor dal/togari bele
2 packed cups cleaned, chopped Dill leaves
1/2 cup milk (I used skim milk)
3 cups water to cook
1 Tblsp salt (adjust to taste)
Kootu masala: 
1 Tsp chana dal/Kadle bele
1/2 Tsp Urad dal/uddina bele
1 Tsp black pepper corns/menasu
1/2 Tsp cumin seeds/jeerige
1/2 Tsp coriander seeds/kothambari
1 dry red chili
2 Tsp grated coconut -fresh or frozen

How do you make Dill Leaves kootu?
  • Wash the toor dal in water and cook it until soft but the dal holds shape, I used my pressure cooker and cooked it for 10 minutes. 
  • Dill leaves take longer to cook/wilt than spinach, so cook it in the pressure cooker along with the toor dal.
  • Dry roast the masala ingredients except for the coconut on medium heat until your kitchen is surrounded in a heavenly aroma :-), it will take about 5 minutes to fry them till done. 
  • Once cool, grind them with coconut to a smooth paste. 
  • Add the ground masala to the cooked dal and Dill mixture, salt and milk. 
  • Add water to get desired consistency and bring it to a rolling boil. 
  • Enjoy the spicy, flavorful kootu with rice, it tastes good as an accompaniment to chapatis, dosa & ildy also. 
Tips: 
  • The Dill I get locally are much longer than what I have seen back home in India, I pick the leaves and chop them and discard the long stalks. 
  • The kootu should be just a tad bit more watery compared to a curry so it mixes well with the rice and sticks well to rotis or dosa.
  • Dal needs to be cooked tender yet holding its shape.  
The Dill leaves kootu goes to Tickling Palates monthly event featuring greens.


Monday, March 12, 2012

Summer tastes - Maavidikaya pappu a.k.a Mango Dal

What does Summer mean to you? For me (even after all these years), summer is synonymous with school vacation, new hobby for the 2 months and mangoes. Yes summer is as much mangoes as winter is avarekayi for me. I love mangoes, period. Growing up in a city like Mysore, we didn't have mango trees in the back yard but come season, there would be no dearth of fresh mangoes in all shapes, sizes and colors. We used to have basketful of mangoes at home but formally restricted to eating them within limits. Me & my younger brother would fight for the juiciest, ripest raspuri mangoes (my favorite kind) and along with the ones chosen for nammamma, anna, and older siblings will put them in a bucket of cool water in the evening. We used to mark the fruit with a signature, a line drawn with nail, pencil anything to identify that it was mine come dessert time. The first one to finish dinner would run to the bucket and get the cooled, washed mangoes to distribute around. After the last morsel of curd rice vanished from the plate and the plates licked clean (yes, we did that), we would start enjoying the delicious fruit peel by peel, Hmmm..

But much before the fruits started appearing at dinner time, there would be a parade of green mango dishes such as mango chitranna (varieties of it), chutneys, tokkus, gojjus, rasam and of course the pickle. Nammamma never brought home the first mango until it was the New Year's day or Ugadi, the first mango had to be cut on that day and a delicious chitranna would be on the lunch menu, after that it was mango everyday in some form or the other. I have no such scruples (read weak will power) since I don't get raw mangoes all the time, I jump at them whenever I find them in my local  grocery store.

We are still ways away from summer where we live, I am yet to find Spring in the air :-) but imagine my happiness when I found the local grocery store carrying fresh green mangoes the other day. It is difficult to decide which dish to prepare since we love everything with mango, but finally after much serious thought, family voted on the Mango pappu - very simple recipe for a flavorful, comforting dal I learned from Amma. This is how we make the mango pappu at home.
What do you need to make Mango pappu? 
1 medium sized firm green mango - washed, peeled and cut into bite sized pieces
1 cup toor dal/kandi pappu
2-3 greeen chilies, slit lengthwise
1/2 Tsp turmeric/pasupu
1 Tblsp salt (adjust to taste)
2 cups of water to cook
For popu/seasoning:
1 Tsp cooking oil
1 Tsp mustard seeds/aavaalu
1 Tsp cumin seeds/jeelakara
1/2 Tsp fenugreek seeds/menthilu
A generous pinch of asafoetida
2-3 curry leaves
2 dry red chilies - broken into half

How do you make Mango pappu? 

  • Wash the dal, add the mango pieces, slit green chilies  and  turmeric, cook it in your pressure cooker until the dal is soft.
  • Once the steam is off, open the pressure cooker, add salt and mash the dal lightly with a spoon.
  • Heat oil in a small pan - add the asafoetida, mustard, cumin, fenugreek seeds along with the red chilies. Let the seeds splutter.
  • Add curry leaves just before switching off.
  • Pour the sizzling popu in to the cooked dal, give it a good mix. 
  • Serve it with hot rice and ghee and dig in. 
Variations: 
  • Use garlic in seasoning if you favor the garlic flavor. 
  • On our recent trip to India, BH's cousin's wife served us with a delicious mango pappu with tomatoes added in, it tasted great too. 
  • I sometimes use moong dal/pesara pappu instead of toor dal. 
Tips: 
  • Get fresh green mangoes that are firm and tart for best taste. 
  • Adjust amount of mangoes based on how tart you like your dal, the mangoes I had were slightly sour and I used 2 of them. 


Friday, March 9, 2012

Bendekayi Gojju - Tangy, spicy okra gravy

A typical conversation around meal time at home follows:
He says 'Sambar', I say 'Huli'.
He says 'pachadi', I say 'Chutney'
He says 'charu', I say 'saaru'
He says 'koora', I say 'Palya'

He makes fun of me when I serve a yogurt based gravy calling it bajji, for him bajji is a deep fried snack. I smile at the generic term pachadi used for both kinds with vegetable pieces and ones with ground up veggies. Thus goes on our light hearted banter in this cross border marriage until food fanaticism takes over, becomes personal and turns into fights. We end up having a Tu Tu - Mai Mai session  until the food beckons us, then all is well with the world again atleast until the next time.

In the years I have been married to BH from the neighboring state, I have learned many nuances of the Telugu cooking while teaching him the subtleties of the Kannada cuisine. Big time foodies that we both are, we have enjoyed finding similarities and differences in the many recipes that we come across from the two regions. When I am annoyed with him, the one thing I shove at him is the famous gojju which doesn't (according to me) has an equivalent in his vocabulary so I can feel like I scored one :-), then he does retort back that some curries from Andhra cuisine have similar ingredients but having similar ingredients is not the same as having the same ingredients.

Gojju for me is that ultimate treat, a perfect blend of multiple tastes resulting in a burst of flavors. We always had more of this side dish than the usual main dishes as we would finish bowlfuls of the gojjus nammamma made. There are variations to making a gojju, it is a spicy, tangy gravy that makes a great accompaniment to rotis or rice. Nammamma makes perfectly consistent gojjus bringing out the individual flavors of the vegetables used by a subtle variation of one of the spices used or the way it is cooked. Gojjus are made with different vegetables (fried, boiled, steamed), there are hasi gojjus (no boiling/cooking involved) and bisi gojjus (heating or cooking involved). Gojjus are rarely made with a combination of vegetables, the only combination I encourage in my kitchen is the onion-tomato (a.k.a eerulli-tomato) gojju. Talk about weirdness..

Today's recipe - Okra gojju is a favorite at home, daughter loves it with rotis or chapatis, I love to eat it mixed with rice and BH loves it both ways :-). Like bitter gourd, people get divided into okra lovers or okra haters generally without any middle ground. Treated with care, this is a delectable vegetable with a very mild flavor and nutrients. If you are a first time user of okra, follow the tips at the end of the post to get a non-slimy, tasty okra dish.
What do you need to make Okra gojju? 
1 pound of okra (about 25 tender ones)
small lime size tamarind - soaked in warm water for 15 minutes
2 Tblsp grated coconut - fresh or frozen
4-5 stalks of cilantro, cleaned and trimmed
1 Tsp jaggery/brown sugar
1 Tblsp salt (adjust to taste)
1 Tsp cooking oil
1/2 Tsp turmeric powder
For the gojju masala: 
2 Tsp chana dal/kadle bele
1/2 Tsp urad dal/uddina bele
1/2 Tsp fenugreek seeds/menthya
1 Tblsp white sesame seeds
4-5 green chilies cut into half
1 Tsp cooking oil
For vaggarane/seasoning/Tadka:
1 Tsp cooking oil
1 Tsp mustard seeds
1/2 Tsp fenugreek seeds
3-4 curry leaves
1/2 Tsp asafoetida

How do you make Okra Gojju?
  • Prepare Okra - Wash and drain them, pat dry with a towel each of the okra until there is no moisture. 
  • Remove and discard both ends of the okra, cut the okra into roundels of 1/2 inch thickness. 
  • Heat 1 Tsp of oil in your cooking vessel on medium high, add the okra pieces, turmeric, cover and let cook for 8-10 minutes until okra softens and turns pale green in color.
  • Open the lid, mix it once and add the tamarind juice extract from the soaked tamarind.
  • Add salt, cover and cook further for 5 minutes. 
  • Fry the ingredients listed under 'gojju masala' in oil until the dals turn light pink and green chilies develop blisters on skin. Let cool
  • Grind the fried masala ingredients along with coconut and cilantro into a smooth paste by adding 1/2 cup of water. 
  • Pour the masala into the okra pan, add jaggery and mix. 
  • Adjust the consistency of the gojju with water, it should be neither runny nor dry. 
  • Let the mixture come to a rolling boil, switch off the stove. 
  • Prepare seasoning by heating oil, add ingredients listed under vaggarane except curry leaves, let mustard and fenugreek crackle, switch off the stove, add curry leaves and pour the sizzling vaggarane on top of the gojju to finish off. 
Variations: 
  • Use 1 Tsp of tamarind concentrate in place of tamarind.
Tips: 
  • Before you start cutting okra, make sure you have dried it completely. I usually leave it to air dry before patting them individually with a dry towel. This step is crucial to reduce the sliminess of okra. 
  • As you cut okra, you will notice your knife picking up the clingy thing from okra, keep a paper towel handy to wipe off the knife before you continue cutting. 
  • Gojju should be balanced in its sweet-sour-spicy-salty tastes, adjust the ingredients to get it to your taste. 
  • The chana dal in the masala makes the gravy thick on boiling, adjust the water to get the right consistency. Note: Leave the Gojju in a slightly liquid form when you switch off, it thickens as it cools. 
  • Tamarind, yogurt or tomatoes help remove the sliminess in okra, use these in various dishes to get a slime free okra dish.